My Dev Environment for Coding Agents
WSL2, WezTerm, Neovim, and why I moved everything into Linux
My daily driver for working with coding agents is WSL2 (Windows Subsystem for Linux) + Docker + WezTerm + Neovim. I have 26 plugins, more than half of which I have used only once. My leader key is a comma. I hand tuned the ANSI colors to match my editor theme.
Let me admit it upfront. I realize some will question why a Product Manager needs a complex development environment. I have spent more time tuning ANSI colors than writing PRDs. I regret nothing.
This article will tell you why I did what I did, and whether it is actually worth it.
The Stack
Before we get into any of the details, here is a quick overview of everything I use daily. The philosophy is simple: stay in one window, remove friction and never wait for a GUI to load.
| Layer | Tool | Why |
|---|---|---|
| Environment | WSL2 (Ubuntu) | Full Linux kernel on Windows |
| Terminal | WezTerm | GPU-accelerated, Lua-configured, opens directly into WSL |
| Shell | Zsh + Starship | Fast prompt (Rust-based), git-aware, cross-shell config |
| Editor | Neovim | Modal editing, 26 plugins, Lua all the way down |
| Theme | Moonfly | Dark charcoal palette, easy on the eyes for long sessions |
| Secondary | Zed | When I need a GUI editor for quick visual diffs or pair sessions |
The rest of this post walks through each layer, why I chose it, and the specific config choices that actually matter in practice.
WSL2: Why Your Windows Machine Should Think It’s Linux
NOTE : If you use macOS or Linux, you can skip this section
There is a moment every developer on Windows knows. You install a tool. It does not work. You Google it. The first answer says “this only works on Linux.” You sigh. You open a VM. It is slow. You sigh again.
WSL2 fixes this. Not partially, not with workarounds. It runs an actual Linux kernel inside Windows. Background services work. Every tool that expects a Linux environment just.. works.
Why WSL2 matters for AI coding agents
This part surprised me. When I started using AI coding agents like Claude Code, OpenCode and Codex, WSL2 went from “nice to have” to essential. These agents need to run build systems, package managers, language servers, and sometimes Docker containers. They do all of this autonomously. On native Windows, half of those operations fail or need special handling. On WSL2, the agent just runs the Linux commands it was designed for, and everything works on the first try.
In fact, if you read official documentation from Claude Code, OpenCode, and Codex, they all recommend using WSL2 as well.
The performance difference is real too. Git operations are noticeably faster in WSL2 than in native Windows, even for large codebases. When an agent is generating and modifying dozens of files in a session, that speed difference compounds fast.
One important detail: keep your project files in the Linux filesystem (/home/), not on the Windows mount (/mnt/c/). The cross filesystem penalty is significant and this is the single biggest performance mistake I made when I was starting out.
Setting it up
If you are on Windows 10 (build 19041+) or Windows 11, the install is one command:
wsl --installThis installs Ubuntu by default. If you want a specific distro:
wsl --install -d Ubuntu-22.04After installation, set WSL2 as the default version:
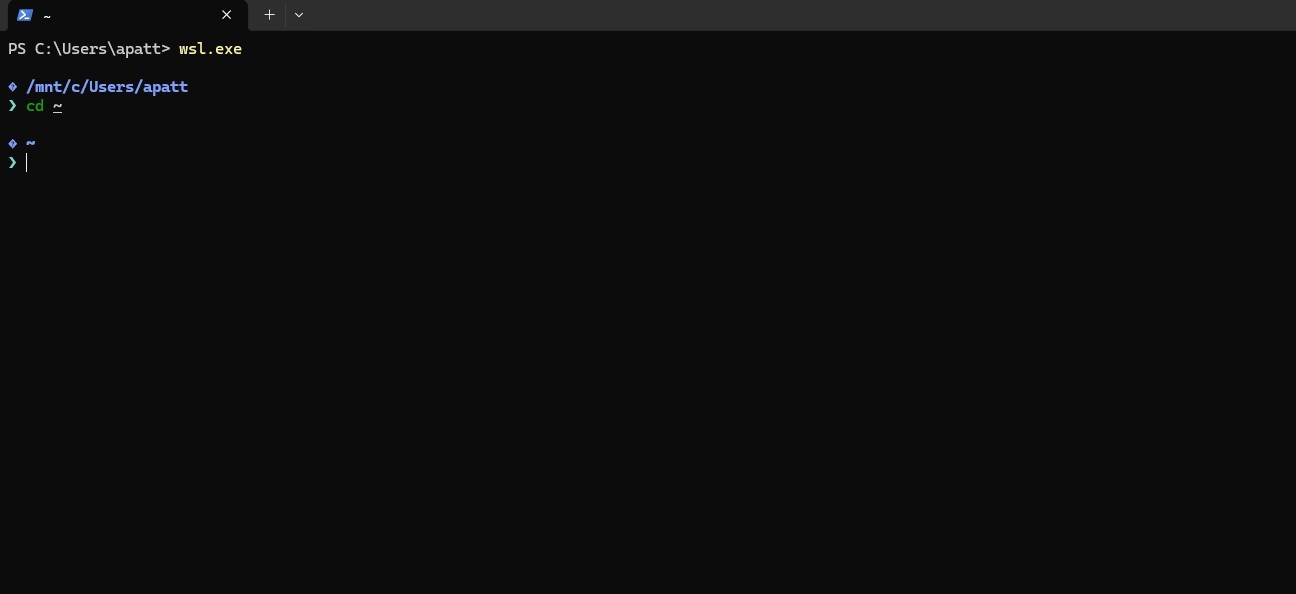
wsl --set-default-version 2To verify everything is running on WSL2 (Img. 1):
wsl -l -vYou should see your distro listed with VERSION 2. If it shows VERSION 1, you can convert it:
wsl --set-version Ubuntu 2Once inside your WSL environment, update packages and install the basics:
sudo apt update && sudo apt upgrade -y
sudo apt install git curl wget build-essential -y
That is it. You now have a full Linux environment. No VM management. No dual booting. Just Linux, running alongside Windows, sharing your clipboard and filesystem.

WezTerm: My Terminal of Choice
I tried Windows Terminal. I tried Alacritty. I landed on WezTerm, and the reason is simple. It is the only terminal I have used where the configuration language is powerful enough to make the terminal genuinely smart.
WezTerm is implemented in Rust, GPU accelerated, cross-platform and configured entirely in Lua. That last part is what makes it special. Lua is not just a config format. It is a programming language. You can write conditionals, event handlers and custom logic into your terminal config.
Opening straight into Linux
The first thing I configured was the default program. Instead of opening a Windows shell and then typing wsl, WezTerm boots directly into my Ubuntu environment:
-- Set WSL Ubuntu as default and start in Linux home directory
config.default_prog = { 'wsl.exe', '-d', 'Ubuntu', '--cd', '~', '--', 'zsh', '-l' }
Small thing, but removing that one daily decision compounds over time. You open your terminal and you are already where you need to be.
Launch menu: one keystroke to start working
I was spending more time getting to the work than doing it. So I set up a launch menu that opens specific projects with specific tools in a single action:
config.launch_menu = {
  {
    label = 'Demo Project with Claude',
    args = { 'wsl', '-d', 'Ubuntu', '--cd', '/home/apatt/projects/demo_project/code',
             '--', 'bash', '-l', '-c', 'claude' },
  },
  {
    label = 'Demo Project',
    args = { 'wsl', '-d', 'Ubuntu', '--cd', '/home/apatt/projects/demo_project/code' },
  },
  {
    label = 'WSL Home',
    args = { 'wsl', '-d', 'Ubuntu' },
  },
}
One menu entry opens a project and immediately starts Claude Code. Another opens the same project in a regular shell. No navigating, no cd-ing through directories. Pick from the menu and you are working.
Smart close logic
This is the config detail I did not expect to love. WezTerm lets you close panes differently depending on what is running in them. If Neovim is in the foreground, close instantly (Neovim has its own save prompts). If it is a shell, confirm first, because you might have unsaved work or a running process:
local function is_editor(process_name)
  if not process_name then return false end
  process_name = process_name:match("([^/\\]+)$") or process_name
  process_name = process_name:lower()
  return process_name:match("nvim") or
         process_name:match("vim") or
         process_name:match("nano") or
         process_name:match("emacs")
end

wezterm.on('close-pane', function(window, pane)
  local process_name = pane:get_foreground_process_name()
  if is_editor(process_name) then
    window:perform_action(wezterm.action.CloseCurrentPane { confirm = false }, pane)
  else
    window:perform_action(wezterm.action.CloseCurrentPane { confirm = true }, pane)
  end
end)
This sounds like a minor nicety until you are in flow and accidentally hit the wrong keybinding. Then it is the difference between “phew” and “DOH!”
Color matching across tools
One thing I spent more time on than I should admit, making WezTerm’s ANSI colors match my Neovim theme, Moonfly (more on that later). The terminal and editor share the same palette, so everything feels like one cohesive environment rather than two tools awkwardly stitched together:
config.colors = {
  foreground = '#c6c6c6',
  background = '#080808',
  cursor_bg = '#9e95c7',
  ansi = {
    '#323437',  -- black
    '#ff5454',  -- red
    '#8cc85f',  -- green
    '#e3c78a',  -- yellow
    '#80a0ff',  -- blue
    '#d183e8',  -- magenta
    '#79dac8',  -- cyan
    '#c6c6c6',  -- white
  },
}
Key bindings that make sense
WezTerm’s keybinding system is straightforward. Split panes, navigate between them, zoom in on one pane when you need focus. The bindings I actually use daily:
config.keys = {
  -- Pane splitting
  { key = 'Enter', mods = 'CTRL|SHIFT',
    action = wezterm.action.SplitHorizontal { domain = 'CurrentPaneDomain' } },
  { key = '"', mods = 'CTRL|SHIFT|ALT',
    action = wezterm.action.SplitVertical { domain = 'CurrentPaneDomain' } },

  -- Pane navigation
  { key = 'LeftArrow', mods = 'CTRL|SHIFT',
    action = wezterm.action.ActivatePaneDirection 'Left' },
  { key = 'RightArrow', mods = 'CTRL|SHIFT',
    action = wezterm.action.ActivatePaneDirection 'Right' },

  -- Zoom pane (toggle fullscreen for one pane)
  { key = 'z', mods = 'CTRL|SHIFT',
    action = wezterm.action.TogglePaneZoomState },

  -- Copy Mode (Vim-style text selection in terminal)
  { key = 'x', mods = 'CTRL|SHIFT',
    action = wezterm.action.ActivateCopyMode },
}
The full config lives at ~/.config/wezterm/wezterm.lua and clocks in at over 300 lines. Most of that is appearance and keybindings. The logic that actually makes it smart is maybe 40 lines.
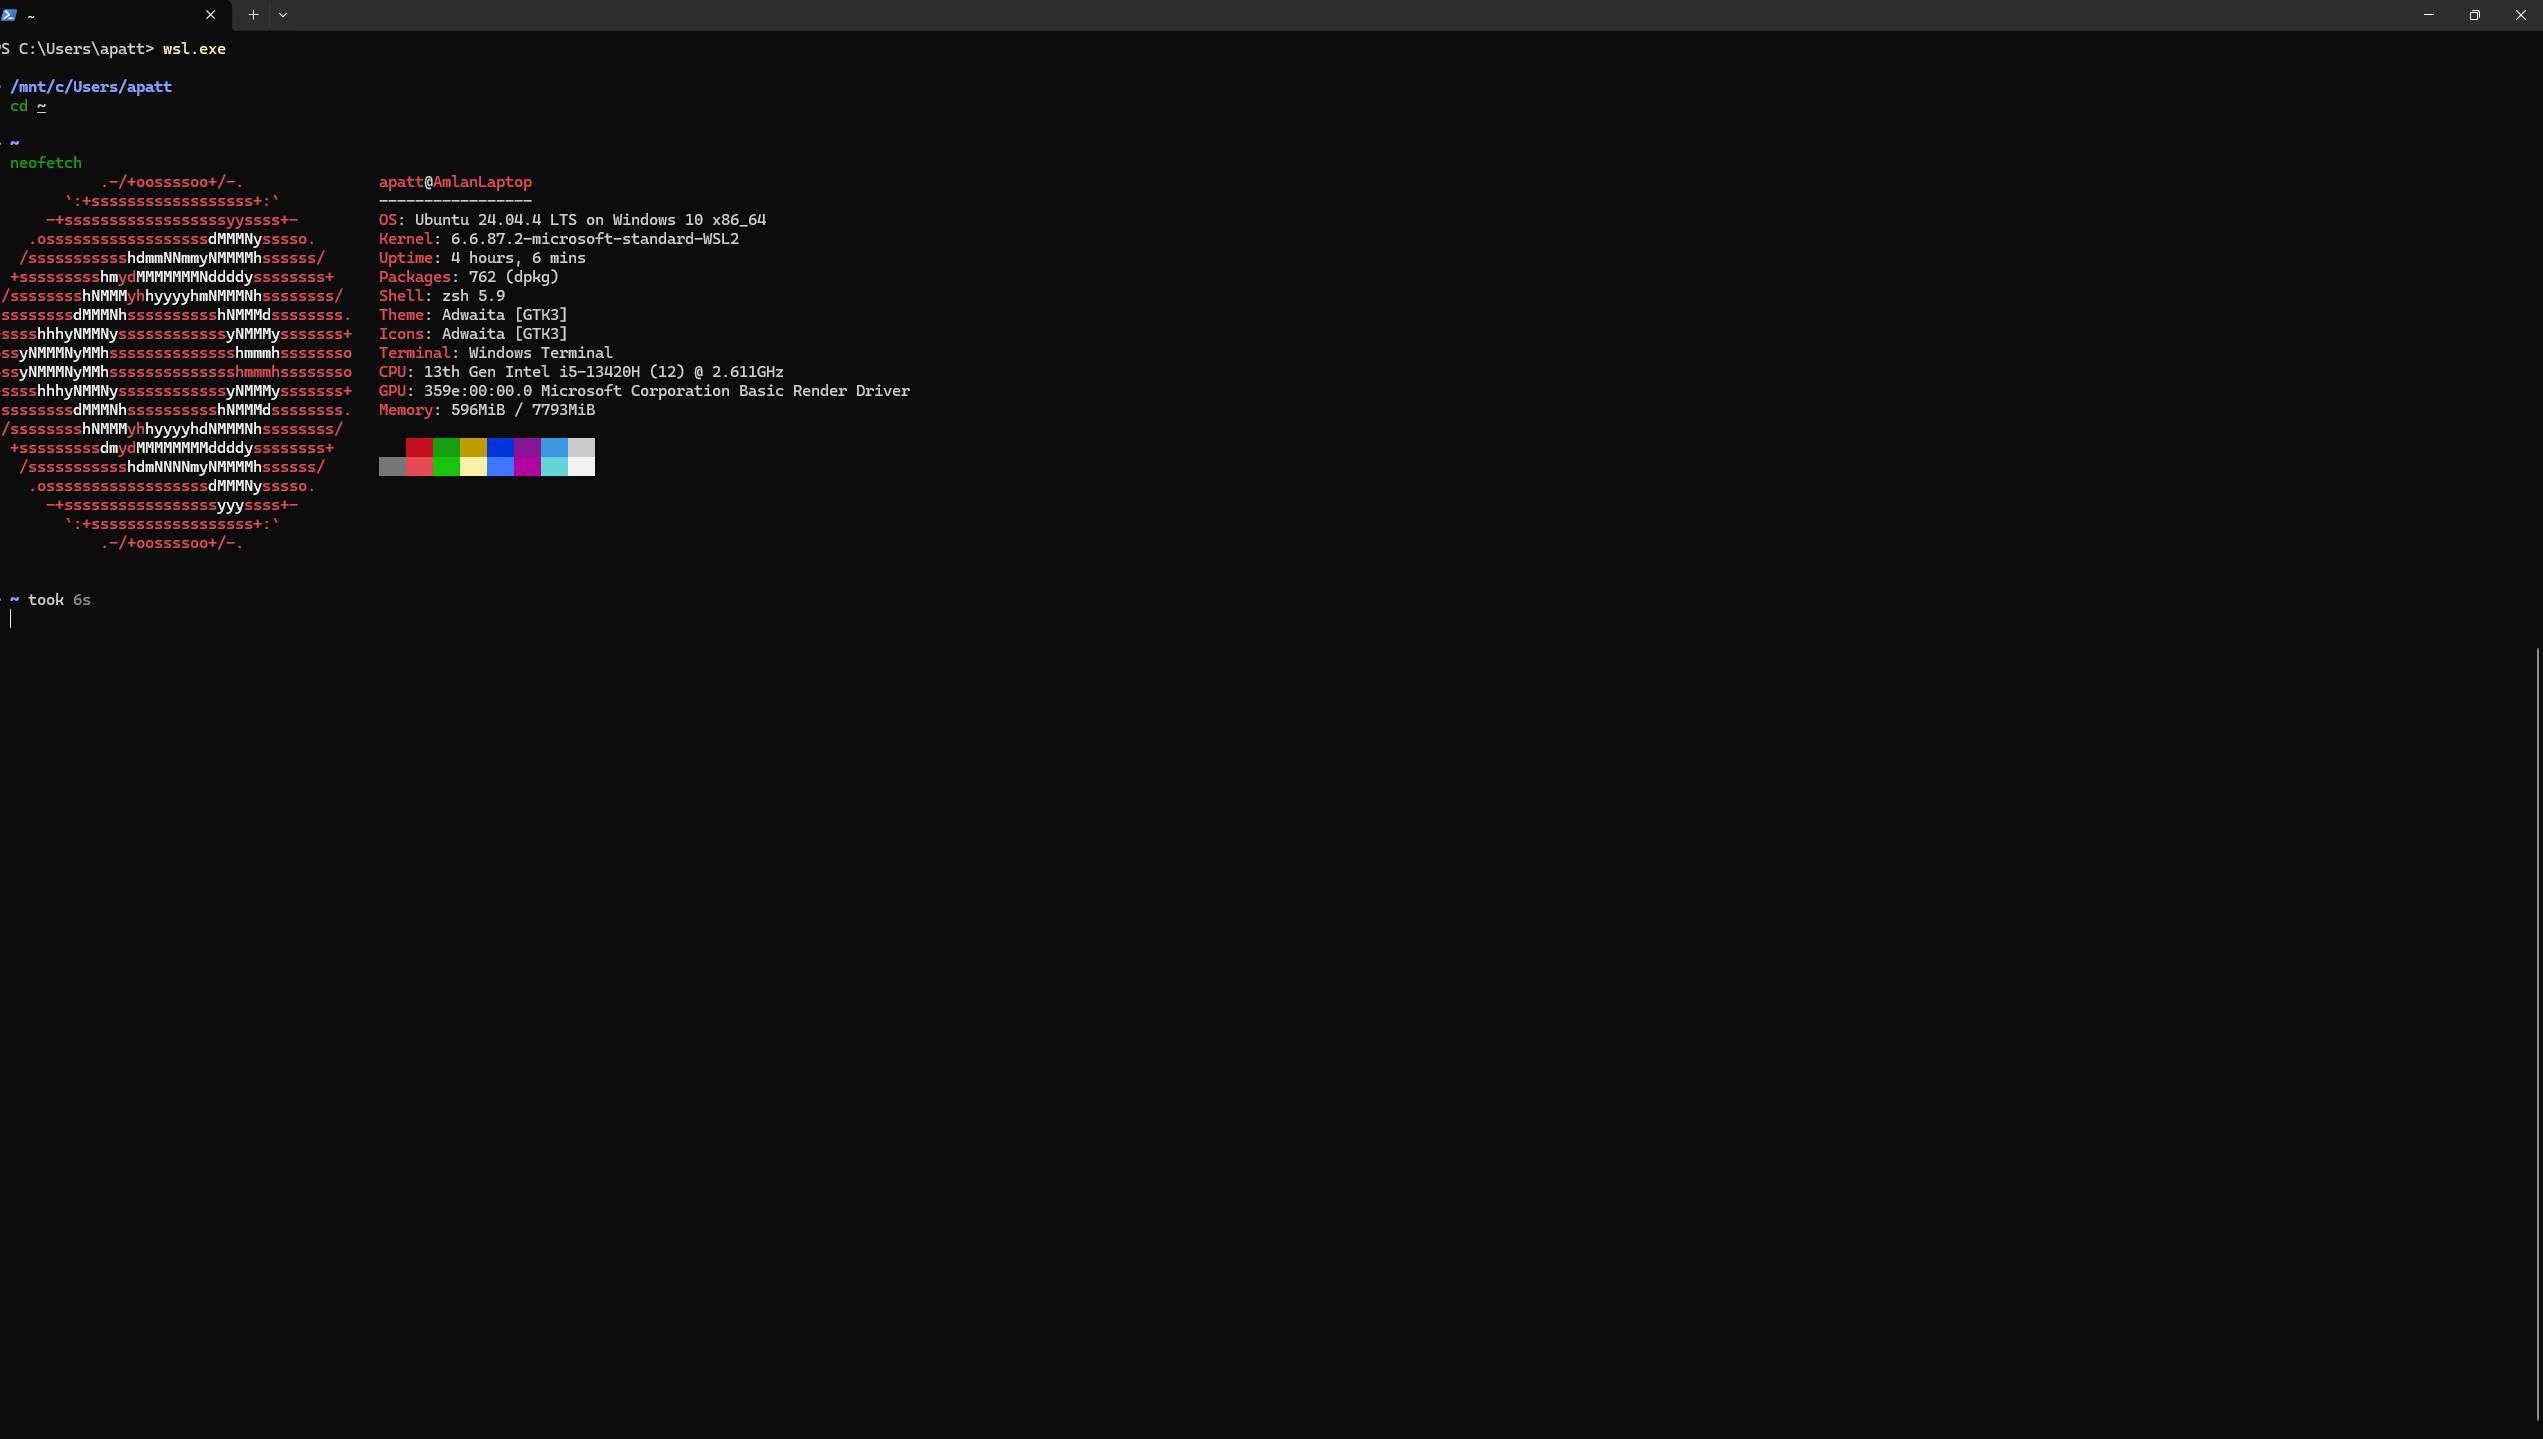
Wezterm with 3 split panes: Neovim (Left Pane), Dev server (Bottom Right Pane) and one with the shell prompt visible (Top Right Pane)
Starship: The Prompt (No, not that prompt)
Most people may never worry about their shell prompt. Often, it shows the current directory, maybe a $ and that is it. Starship replaces that with a prompt that is context aware. It knows your git branch, how many files have changed, what language runtime you are using and how long your last command took.
Starship is written in Rust, so it is fast. It supports about 100 modules, but you only pay for the ones you enable. And the same TOML config works across Bash, Zsh, Fish, PowerShell, etc. Switch shells, keep your prompt.
Here is my config:
add_newline = true
format = """
$directory$git_branch$git_status$nodejs$bun$package$python$rust$docker_context$cmd_duration
$character"""
right_format = ""
[time]
disabled = true
# ── Directory ──────────────────────────────────────────────────────────────────
[directory]
style = "bold #80a0ff"
truncation_length = 4
truncate_to_repo = true
format = "[ $path]($style)[$read_only]($read_only_style) "
# ── Git ────────────────────────────────────────────────────────────────────────
[git_branch]
symbol = " "
style = "bold #d183e8"
format = "on [$symbol$branch]($style) "
[git_status]
style = "#e3c78a"
format = '([$all_status$ahead_behind]($style) )'
conflicted = "="
ahead = "⇡${count}"
behind = "⇣${count}"
diverged = "⇕⇡${ahead_count}⇣${behind_count}"
untracked = "?${count}"
stashed = "$${count}"
modified = "!${count}"
staged = "+${count}"
renamed = "»${count}"
deleted = "✘${count}"
# ── Command duration ───────────────────────────────────────────────────────────
[cmd_duration]
min_time = 2000
style = "#7c8f8f"
format = "took [$duration]($style) "
# ── Prompt character (line 2 — where you type) ────────────────────────────────
[character]
success_symbol = "[❯](#79dac8)"
error_symbol = "[❯](#ff5454)"
A few things worth pointing out:
Git status with counts tells me not just that files changed, but how many. !3 +1 ?2 means three modified files, one staged, two untracked. When I am jumping between product work and code changes all day, seeing this in the prompt means I never have to stop and run git status to remember where I am.
Language version detection is automatic. Jump into a Node.js project and the Node version appears. Walk into a Python project and the Python version shows up. Leave the project and it disappears. No manual toggling, no extra config per project.
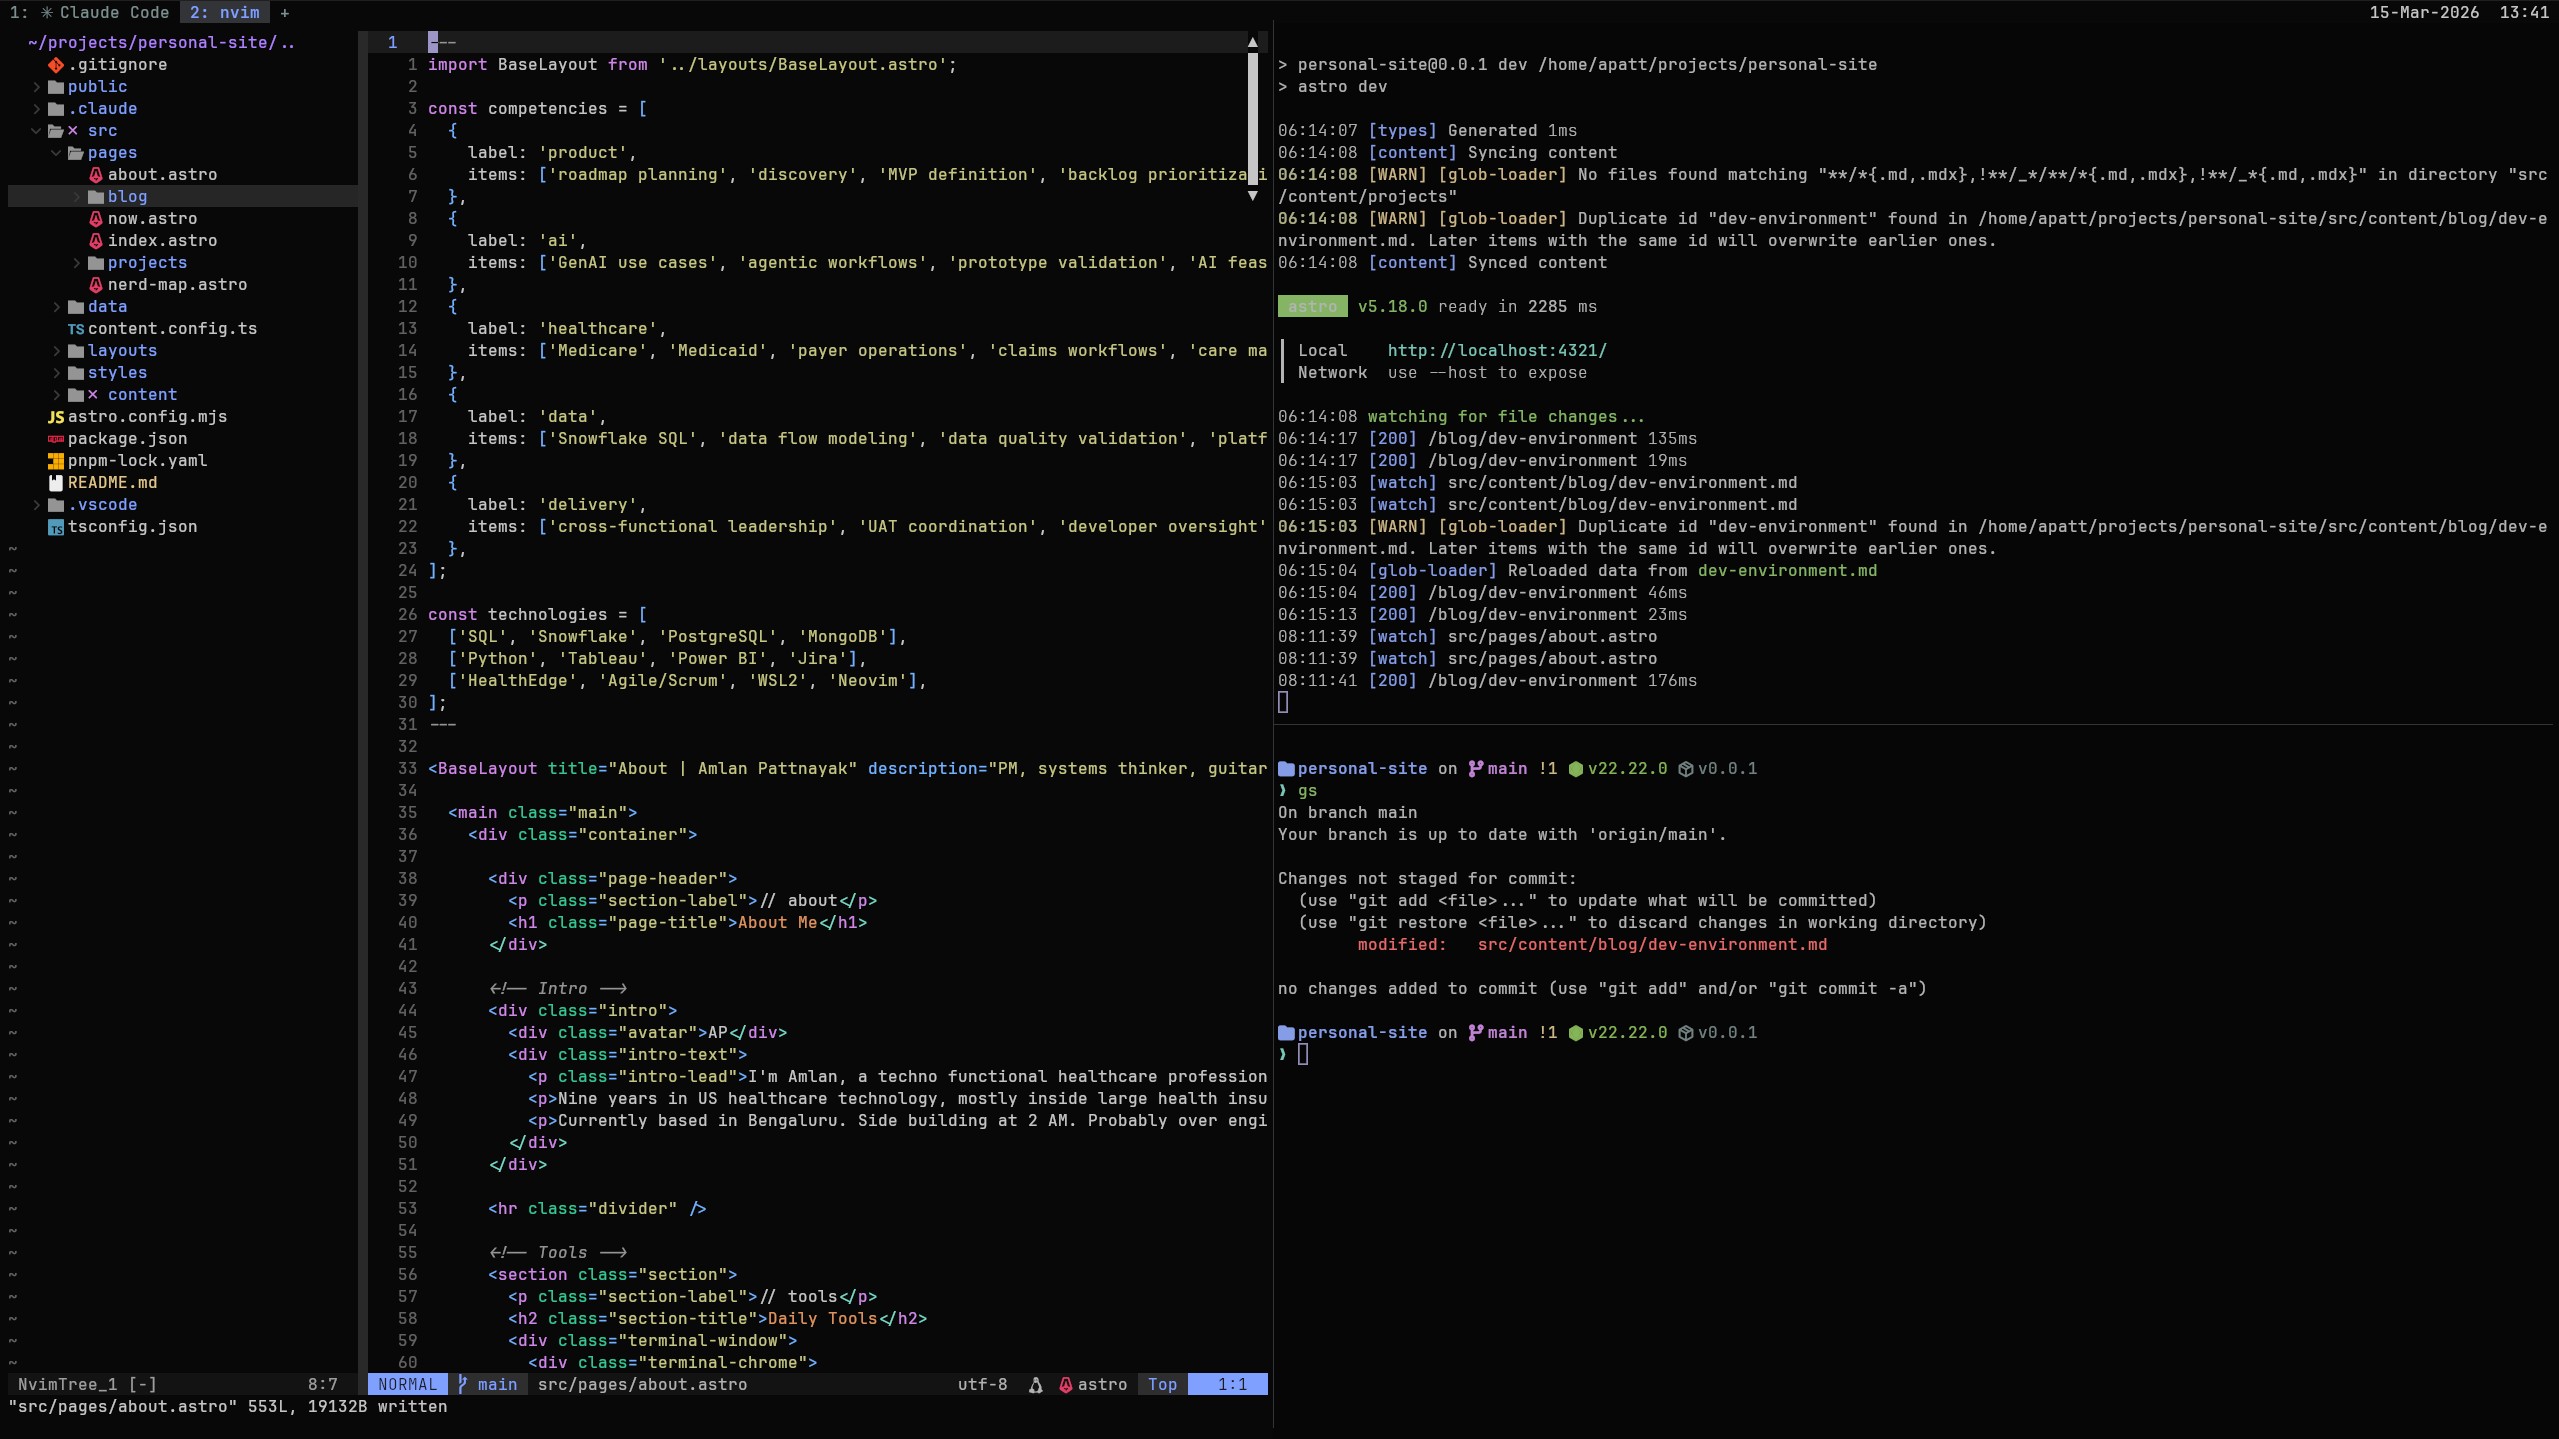
Starship prompt showing the languages used in the project i.e. Node.js and Python. Git status count shows 7 deleted files (
x7), 6 modified files (!6), 40 untracked files (?40), and branch is 1 commit ahead of main (↑1)
Neovim: The Editor of Choice
Neovim is a modern fork of Vim, the legendary terminal editor known for both its power and its learning curve. It runs inside the terminal and is designed to be customized extensively through configuration and plugins.
Instead of shipping as a fully featured IDE, Neovim gives you a minimal core and lets you assemble the rest of your environment exactly the way you want.
Which is how you eventually end up with 26 plugins.
26 plugins is a lot. But the number is misleading. Most of them I forget are there. The interesting ones are the ones that actually made my workflow more efficient.
The init.lua foundation
Everything starts with init.lua. This is where the basics live: leader key, line numbers, indentation, search behavior. Nothing fancy, but get these right, and everything else feels natural to your personal workflows:
-- Set leader key (must be set before lazy.nvim)
vim.g.mapleader = ","
vim.g.maplocalleader = ","

-- Line numbers (relative for quick jumps)
vim.opt.number = true
vim.opt.relativenumber = true

-- Tabs: 2 spaces, always
vim.opt.tabstop = 2
vim.opt.shiftwidth = 2
vim.opt.expandtab = true

-- Search: case-insensitive unless you use capitals
vim.opt.ignorecase = true
vim.opt.smartcase = true

-- Splits open to the right and below (feels natural)
vim.opt.splitright = true
vim.opt.splitbelow = true
Relative line numbers deserve a mention. When you see 7 next to a line, you know that 7j will jump you there. No counting, no guessing. It turns vertical navigation from “scroll and hunt” to “glance and go.”
Moonfly: The Theme That Disappears
I have tried a lot of Neovim themes. Moonfly.Kanagawa Dragon (which I still keep as a backup in my config). Tokyo Night. Catppuccin. I kept coming back to Moonfly.
The creator describes it as a “dark charcoal” theme, and that is exactly why I love it. The background is about as dark as you can go without being pure black. The accent colors are vibrant but not aggressive; soft blue for functions, green for strings, magenta for keywords, yellow for constants.
Here is the full Moonfly config in my setup:
return {
  "bluz71/vim-moonfly-colors",
  name = "moonfly",
  priority = 1000,  -- Load before other plugins
  config = function()
    vim.g.moonflyItalics = true           -- Italics for comments and keywords
    vim.g.moonflyTransparent = false      -- Solid background
    vim.g.moonflyNormalFloat = true       -- Consistent float backgrounds
    vim.g.moonflyTerminalColors = true    -- Use moonfly colors in :terminal
    vim.g.moonflyVirtualTextColor = true  -- Colorful diagnostics/virtual text

    vim.cmd.colorscheme("moonfly")
  end,
}
A few choices worth explaining:
Italics enabled for comments and keywords. This creates a subtle visual hierarchy: regular code is upright, comments are italicized, keywords are bold. You learn to parse the structure without reading every word.
Transparent mode off. Some people like seeing their wallpaper through their editor. I find it distracting. The solid black background is the foundation that makes everything else readable.
Plugin management with lazy.nvim
All 26 plugins are managed by lazy.nvim, which auto-installs itself on first launch:
local lazypath = vim.fn.stdpath("data") .. "/lazy/lazy.nvim"
if not vim.loop.fs_stat(lazypath) then
  vim.fn.system({
    "git", "clone", "--filter=blob:none",
    "https://github.com/folke/lazy.nvim.git",
    "--branch=stable", lazypath,
  })
end
vim.opt.rtp:prepend(lazypath)

require("lazy").setup("plugins", {
  rocks = { enabled = false },
})
Each plugin gets its own Lua file in ~/.config/nvim/lua/plugins/. This keeps things modular. Want to disable a plugin? Delete or rename its file, and pretend you never spent 4 hours on a saturday night configuring that plugin.
Telescope: The Fuzzy Finder That Replaced My File Tree
If I had to keep only one Neovim plugin, it would be Telescope. Not because it is the flashiest, but because it fundamentally changed how I navigate code.
Telescope is a fuzzy finder, but calling it that undersells it. It is a general purpose search interface allowing you to find files by name, search across an entire codebase with live grep, browse open buffers, search help docs, find git commits. All through the same floating window with the same keybindings.
My configuration
telescope.setup({
  defaults = {
    layout_strategy = "center",
    layout_config = {
      center = {
        height = 0.5,
        width = 0.8,
        prompt_position = "top",
      },
    },
    sorting_strategy = "ascending",
    prompt_prefix = " 🔍 ",
    selection_caret = "  ",

    file_ignore_patterns = {
      "node_modules", ".git/", "dist/", "build/", "%.lock",
    },

    mappings = {
      i = {
        ["<C-j>"] = actions.move_selection_next,
        ["<C-k>"] = actions.move_selection_previous,
        ["<Esc>"] = actions.close,
        ["<C-y>"] = copy_path,  -- Custom: copy file path to clipboard
      },
    },
  },
})
The center layout places the finder in the middle of the screen, like a spotlight search. Results appear above the prompt, sorted ascending so the best match is always closest to where you are typing.
Some other plugins that changed my workflow
Nvim-Tree is my file explorer, with one change from the default that I would miss immediately: files sort by modification time, not alphabetically. The most recently edited files move to the top. When you are jumping between five files in a feature branch, you do not want to hunt through an alphabetical list:
sort = {
  sorter = function(nodes)
    table.sort(nodes, function(a, b)
      local stat_a = vim.loop.fs_stat(a.absolute_path)
      local stat_b = vim.loop.fs_stat(b.absolute_path)
      if stat_a and stat_b then
        return stat_a.mtime.sec > stat_b.mtime.sec
      end
      return false
    end)
  end,
  folders_first = false,
}
Which-Key solves the “I set up 30 keybindings and forgot half of them” problem. Press the leader key, and within a few milliseconds, a popup appears showing every available binding, organized by group. It turns Neovim from “memorize everything” to “explore and discover”:
wk.add({
  { "<leader>f", group = "Find (Telescope)" },
  { "<leader>e", group = "Explorer" },
  { "<leader>c", group = "Copy" },
  { "<leader>y", group = "Yank/Copy" },
})
Render-Markdown renders markdown in place. Headings look like headings. Checkboxes render as checkboxes. I write product specs in markdown constantly. Seeing the rendered output without leaving the editor is the kind of thing that sounds like a small QOL improvement until suddenly you cannot live without it.
Rainbow CSV is the most underrated nvim plugin. As the name suggests, it helps in formatting CSV files natively in Neovim. Each column gets a distinct color. You can run SQL-style queries on a CSV directly: :Select a1, a3 where a2 > 100. I thought this would be a toy. PMs work with data constantly. I use it more than I expected. Much more than expected.
Custom keybindings for a quicker workflow
One thing I wanted to achieve when I started using Neovim was to move from idea to demoable product as quickly as possible. All my keybindings have been configured keeping that philosophy in mind. A few of the small ones that save me surprising amounts of time are:
-- Copy current file path to clipboard (paste into Jira, Slack, PRs)
vim.keymap.set("n", "<leader>yp", function()
  local filepath = vim.fn.expand("%:p")
  vim.fn.setreg("+", filepath)
  print("Copied: " .. filepath)
end, { desc = "Copy WSL filepath to clipboard" })

-- Copy current file to Obsidian vault (notes flow to one place)
vim.keymap.set("n", "<leader>cop",
  ':!cp -v % "/mnt/c/Users/apatt/Documents/Obsidian Vault/Projects/"<CR>',
  { desc = "Copy to Obsidian (Projects)" })

-- Toggle line wrapping (off for code, on for prose)
vim.keymap.set("n", "<leader>w", function()
  vim.opt.wrap = not vim.opt.wrap:get()
  local status = vim.opt.wrap:get() and "ON" or "OFF"
  print("Line wrap: " .. status)
end, { desc = "Toggle line wrapping" })
The file path copy is the one I use most. One keystroke, paste it into a Linear ticket or a Teams message.Immensely useful.
The keybindings I use constantly
vim.keymap.set("n", "<leader>ff", builtin.find_files, { desc = "Find Files" })
vim.keymap.set("n", "<leader>fg", builtin.live_grep, { desc = "Live Grep" })
vim.keymap.set("n", "<leader>fb", builtin.buffers, { desc = "Find Buffers" })
vim.keymap.set("n", "<leader>fr", builtin.oldfiles, { desc = "Recent Files" })
vim.keymap.set("n", "<leader>fw", builtin.grep_string, { desc = "Find Word under cursor" })
vim.keymap.set("n", "<leader>/", builtin.current_buffer_fuzzy_find, { desc = "Search in current file" })

-- Quick access shortcuts
vim.keymap.set("n", "<C-p>", builtin.find_files, { desc = "Quick file search" })
vim.keymap.set("n", "<C-f>", builtin.live_grep, { desc = "Quick content search" })
Two of these changed my PM work specifically:
<leader>fg (live grep) lets me search the entire codebase in real time. When an AI coding agent tells me “we need to refactor the authentication flow,” I can find every file that touches authentication in under five seconds. My risk estimates are better because I actually know what “change X” involves, instead of guessing.
<C-y> (copy path) is a custom action I added. Inside the Telescope finder, press Ctrl+Y on any result and its absolute path goes to the clipboard. It handles the WSL-to-Windows clipboard bridge automatically:
local copy_path = function(prompt_bufnr)
  local entry = action_state.get_selected_entry()
  local filepath = entry.path or entry.filename or entry.value
  local abs_path = vim.fn.fnamemodify(filepath, ":p")

  if vim.fn.has("wsl") == 1 then
    local escaped_path = abs_path:gsub("'", "''")
    local cmd = string.format(
      "powershell.exe -Command \"Set-Clipboard -Value '%s'\"", escaped_path)
    vim.fn.system(cmd)
  else
    vim.fn.setreg("+", abs_path, "c")
  end

  actions.close(prompt_bufnr)
  vim.defer_fn(function()
    vim.notify("Copied: " .. abs_path, vim.log.levels.INFO)
  end, 100)
end
How Everything Comes Together
All the custom keybindings, aliases, and configurations are for one reason, and one reason only: make my workflow faster, and friction free.
So, let me show you with a (safe) example:
What’s Happening
- While browsing my personal site, I notice the copyright text in the footer still reads “2025 Amlan Pattnayak” across multiple pages.
- Open Wezterm,
cdinto my personal site repo with custom alias:cdsite - Once inside the repo, split the terminal pane horizontally. Because of my custom configuration, the new pane automatically opens in the current working directory.
- In one pane launch Neovim with
nvim. In the other pane start the dev server usingpnpm dev. - Using Telescope’s live grep, search for all instances of “2025 Amlan Pattnayak” and find matches across seven files.
- Press
Ctrl + qto send the search results to Neovim’s quickfix list. - Using
cdowith pattern matching, update 2025 → 2026 and Amlan Pattnayak → Amlan Gaurav Pattnayak across all files. - Quickly verify the changes on the dev server running in the other pane.
- Save the updates across the seven files and quit Neovim.
- Finally, stage and commit the changes.
The Honest Summary
Is this overkill for most PMs? Yes. Most definitely.
Do you need Neovim to be a good PM? No. Absolutely not.
But if you write code regularly, if you want to understand what is actually under the hood of your product, if the gap between “I have an idea” and “I can test that idea” frustrates you, a terminal first setup is worth trying.
The hundreds of lines of config are not overkill. They are what you get when someone got annoyed enough to fix each thing as it came up, one irritation at a time, over about a year. Every one of those lines solved a specific problem that was slowing me down.
The goal was never to be impressive or cosplay as a software engineer. It was to make thinking quicker. Your tools should stop getting in your way. That is the whole argument for deep tooling; not that terminals are cool (well, they are, but I don’t want to digress), but that friction has a cost, and most people just never measure it.
If you want to start, do not start with Neovim. Start with WezTerm. Install it, point it at WSL, use it for a week. That alone reduces the context switching. If you like it, add Starship for a smarter prompt. Then explore Neovim when you are ready. Start with telescope.lua and essentials.lua. Those two give you most of the value with almost none of the 2 AM configuration spirals.
Everything else you add when something annoys you enough that you are forced to find a solution. That is the whole philosophy, really.